How can I connect my printer with a wireless network?

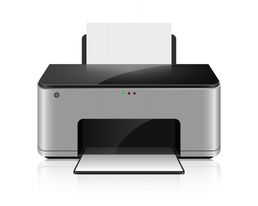
Wireless printing has made our job easy. Earlier, the user had to connect the printer with a PC then take the printouts. He had to copy and paste all the documents on that device for taking the printouts. Otherwise, the user had to reconnect the printer on another device. But today, you can easily share your printer. You have to connect your printer device to the network. Now, connect the PC/phone to the same network and then take the printouts.
Connecting printer to the network
When you connect the printer to your network, you should check the router. If your router has the WPS pin (physical), you can use it to connect the printer. In case the router doesn’t have the WPS pin, you can connect your printer to the network by using the standard connection method. While connecting the printer, make sure the wireless router is already set and in a working state. You can only take printouts from those devices which can connect to the network. You can’t take printouts from old PCs that don’t have Wi-Fi features. After checking the network and PC; you can connect the printer to your network:
- Go to your printer and switch it on
- Hit the setup button of your printer
- Use the arrow keys and then click on Wireless LAN setup
- Hit the OK button
- Choose the Other setup and tap the Cableless setup
Hit the OK button, and now your printer will get connected to the network. Once your printer gets connected to the network, you have to install the printer driver.
Installing the printer driver on a Windows device
The user has to install the printer driver on the PC for accessing the printer. The printer needs the driver to understand the command. The printer driver is the bridge that receives the command from the computer and then sends it to your printer. You can get the printer driver from the CD (you will receive with the printer) or the internet. If the user has the CD, then insert it on the system and run the setup. In case you can’t use the CD, then install the driver from the web. Visit the printer company’s website and check for the driver of your printer model.
Download it on the system and then run the .exe file. Once the printer driver gets installed, tap the Next button. The driver wizard will appear on the screen, select Wireless LAN connection, and then hit the recommended option. Hit the Next button until the driver gets installed on the system. In case the confirmation window appears, tap the Agree button. Now select the Test printing option and tap the next button. Load the pages on the input tray and then hit the Next button. If your printer is not working, then check for the error. Run Canon ip110 troubleshooting for fixing the printer-related error. The error on printing mostly occurs due to the error in setting printer or printer driver. You should check for the possible reasons behind the error.
Fixing printer connection errorWhen your printer is not working on the network, then you should check the printer. Check the ink level of your ink cartridge. Sometimes, the user inserts the cartridge without removing the plastic protective tapes. The contacts can’t touch the printer, and the printer shows the error. Check the cartridge and remove the tapes carefully. After installing the cartridge, restart the printer. Users should scan the PC for malware before connecting it to the printer. Viruses can interrupt the connection, and the printer won’t work. It would help if you tried to take printouts using the USB cable. If the canon printer printing blank pages is working with cable, then the error is in the network connection. But when the printer is not working on cable, you need to check the printer for error.


